

Guide to disassembling and re-keying a Lockwood 243/45, 234B45 or 334B45 variant lock.
Intro:
The Lockwood 234/45 series of padlocks are one of the most commonly found types of padlocks sold in Australia. These locks have 6 pin stacks and relatively high tolerances making them great for intermediate and advanced pickers.
Things you can with this lock:
1) Disassemble into all possible parts
2) Repin/Re-key
3) Decode pins to reverse engineer the key
4) Add security pins/spools/serrated/mushroom pins
5) Modify the core to have advanced anti-pick features
6) Service/clean your lock
7) Gain a deeper understanding of how the lock works
This is important to do once in a while after picking as the pins wear out and gunk builds up inside the lock quite readily.
How to disassemble the padlock
1. Unlock the lock
You can cheat and use the key if you have one.

Padlock re-pinning
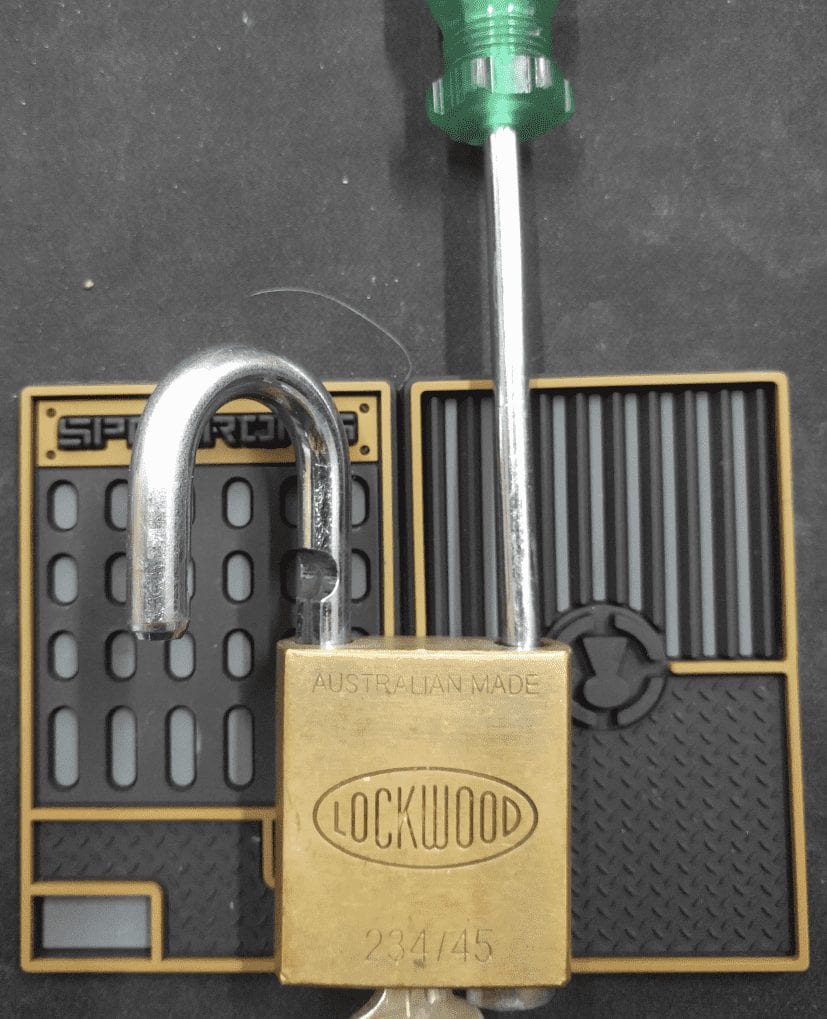
2. Remove screw
Using a standard phillips head screwdriver remove the retaining screw hidden under the shackle
Guide to disassembling and re-keying locks

Internal padlock
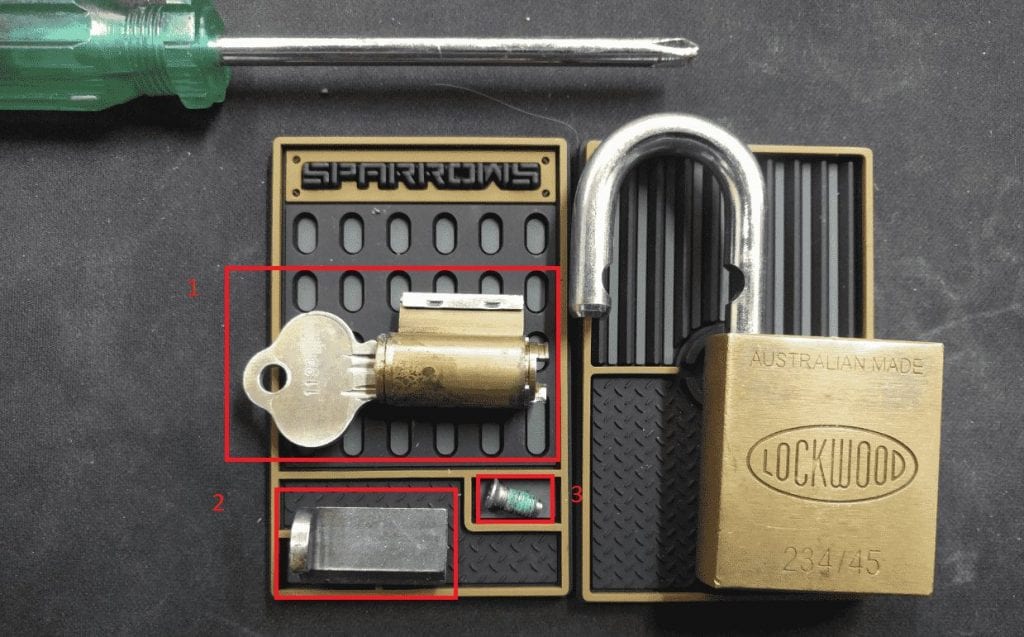
Three things should come out of the lock:
1) The core of the lock
2) The hardened steel anti-drill plate
3) The retaining screw
3. Remove the top cover

Remove the top cover
You will then need to use a flat-head screwdriver to gently pry the top cover off the core as shown below. Make sure that you remove the key first to prevent any excess pressure on the pin-stacks: Note that this must be done carefully in order to prevent springs and pins flying everywhere.
Once the cap has been removed the pin stacks will be exposed and you will be able to dump them out into your pinning tray
4. Remove the Pin
We would recommend using tweezers to handle the pins as they can be rather fiddly to work with.


At this stage, it is now possible to re-pin and re-key using any standard pins (sparrows re-load kit works great!) so that you can try picking further.
The core does not need to be returned to the body to be picked/played with, however, the feedback from inside an actual padlock (with the spring tension of the actuator working against you) isvery different from picking a core in a vice).
You should also be careful when picking in a vice that you do not over-tighten it and deform the core in the vice.
5. Remove the circlip
 After this point, you will then be able to remove the circlip (highlighted in red) from the back of the lock if you wish to extract the plug from the bible:
This is best done using a special circlip(1) removal tool and is only necessary if you wish to modify or inspect the core further. If you do not have a circlip removal tool (2) it is possible (although tricky) to remove them using a pair of needle nose pliers (3).
Highlighted below is also the plug (4) and the ‘bible’ (5)
At this point, it is now possible to easily modify both the core and the bible and turn this lock into a challenge lock by adding threading to the chambers, undercutting chambers, modifying diameters and a number of other things.
These kinds of modifications are for advanced lock pickers and make the cores significantly harder to pick and may require special tools in order create.

6. Repin your lock!
Grab you re-pinning kit and come up with endless combinations of pinning layouts.
7. Re-assemble the lock
Once you have made your modifications, replace the plug in the bible, re-pin the lock and add the springs, then press the steel cap back onto the top of the bible.
If you have pinned the lock to work with a key, this is the time to test that it works reliably.

To re-insert the core, simply re-allign the anti-drill shroud with the core and insert back into the lock as shown here:
Then drop the retaining screw back in the top and screw it in.
The padlock should now open and operate as per usual.
Warnings:
- Do not attempt to close the lock while the core is not present.
- Doing so may result in the guts of the lock falling out and this can be extremely tiring to rectify. If this has happened to you, please consult this guide (to be written).
- Do not twist the circlip when attempting to remove it, doing so will likely break it as it is hardened steel and does not bend easily. Hardware stores will carry replacement ones that are easier to work with.
- Be careful when removing the steel cap to avoid springs and pins going everywhere, make sure you remove the key first!

Guide to disassembling and re-keying locks